Building a split keyboard
Introduction
I started looking for a split keyboard in order to improve my posture while working at my desk all day. I found a few options recommended by ergonomic keyboard enthusiast communities, but was turned off by how expensive many of the options were. I was about to give up and just live with poor posture, when I saw some posts about home built keyboards.
Ordering the parts
I settled on one that seemed to be fairly popular, well designed, and built for those who like ergonomics on a budget: the Cheapino. I was a bit daunted when I saw that it required the builder to fabricate the PCBs themselves, but the build guide reassured me that it'd be a simple process to place the order with the factory. And indeed it was: with just a few clicks, I had uploaded the gerber file to JLPCB's website, selected the lead free option for a buck extra, and the boards were ordered. It was a bit funny to me that the shipping cost from China was far more than the cost fabricating of the boards themselves. I then ordered the rest of the parts on Aliexpress that evening as well. I now just had to wait on the packages to arrive.
The build
A few weeks had passed, and my packages had all finally come. I was a bit worried that they would have heavy tarrifs placed on them that I'd need to pay upon delivery -- I had a 50% tarrif to pay upon delivery on some Raspberry Pi Pico development supplies I'd ordered from the UK recently -- but luckily I had no extra surprise taxes to pay when the packages were dropped off at my door.
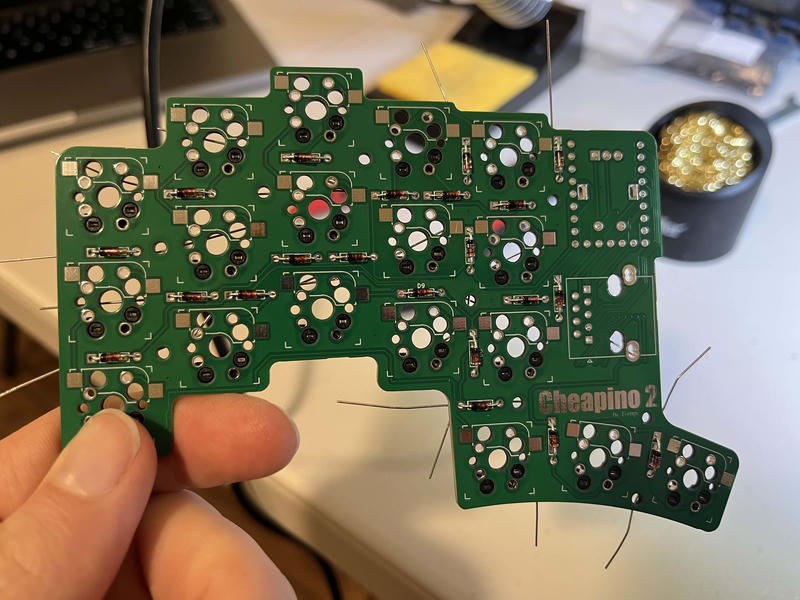
Now let's get to the build. I excitedly unwrapped each of the 20 or so individually wrapped packages like a child on Christmas morning. I prepped all the supplies and began the build process. I hadn't soldered anything since my mechatronics course at university six years ago, but I remembered it being quite medatative once you got in the flow of it.
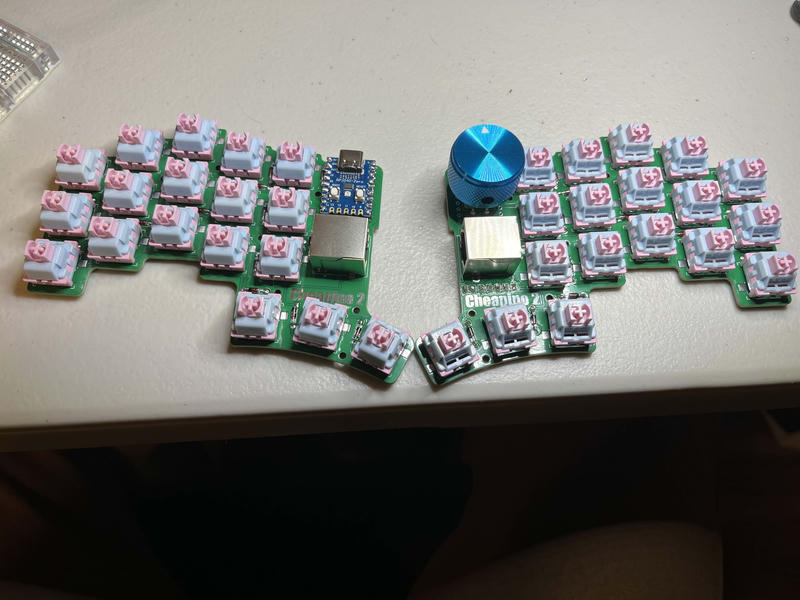
I started with the Kalih hot swap sockets. These are optional, but they allow you to swap out your switches for different ones without needing to desolder the switches themselves. The first few joints were either cold solders that I had to reflow, or I put so much solder on that joint that I had to use my solder sucker to pull it all off. But after I got the hang of it again, it started going quickly and I was able to enjoy listening to Khruangbin's new remix of their old The Universe Smiles Upon You album.

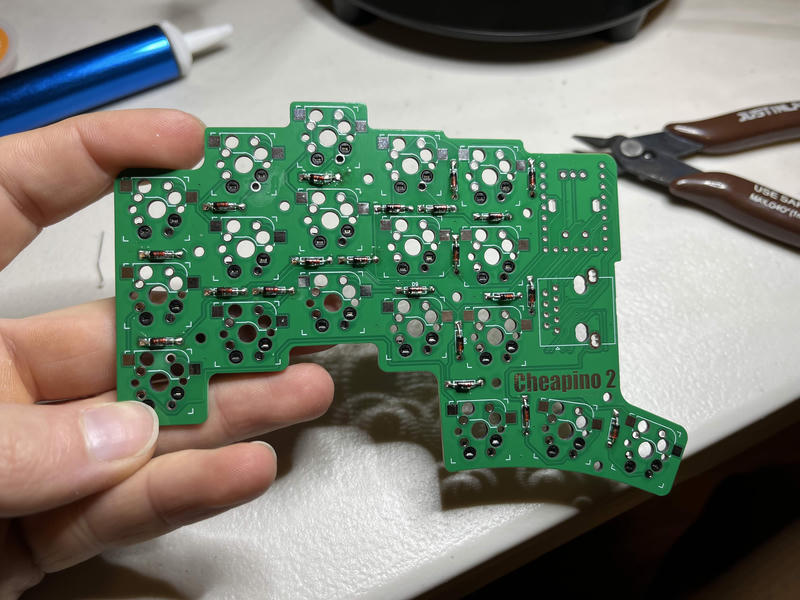
After the hot swap sockets were all on, I moved on to the diodes. I set those all in place and bent the legs so they'd stay in position. Once those were on, I clipped the legs and saved the straigntest ones for the microcontroller.
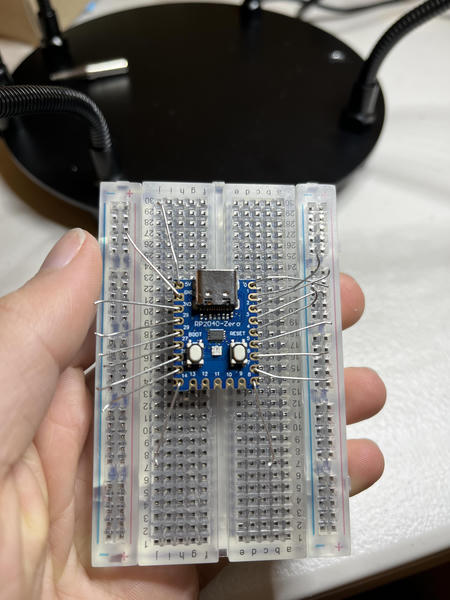
I seated the MCU sockets in a breadboard, put the RP 2040 Zero on top, and stuck the diode legs through each hole. Since these were a bit smaller and closer together, I switched to a more fine point head for my soldering iron. I soldered the legs to the MCU, and then snipped off the extra.
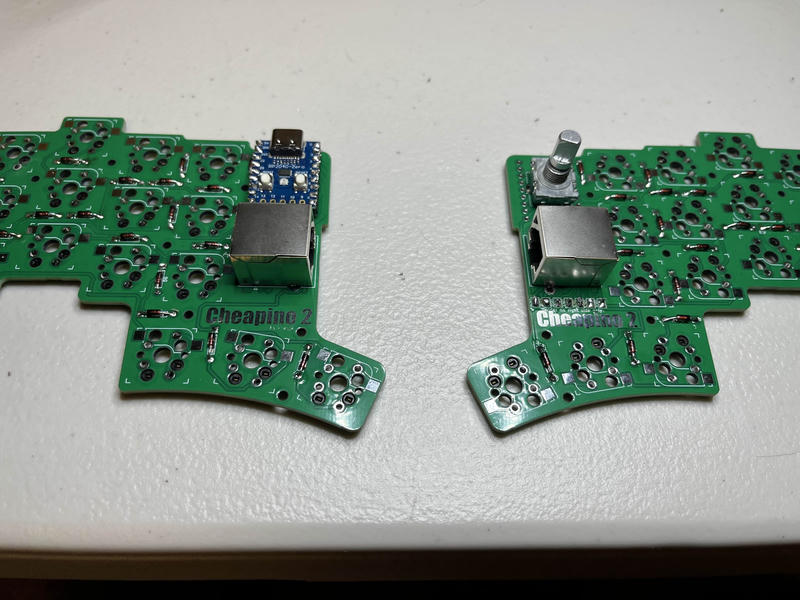
I placed the MCU with the sockets on the left hand of the Cheapino, and soldered the sockets to the board.

I seemed to be moving faster now that I reached the end of the soldering portion of the project. I then placed the encoder and RJ45 connectors on the board and soldered those on as well.
At this point, my cat curled up on my lap to distract me from my progress.
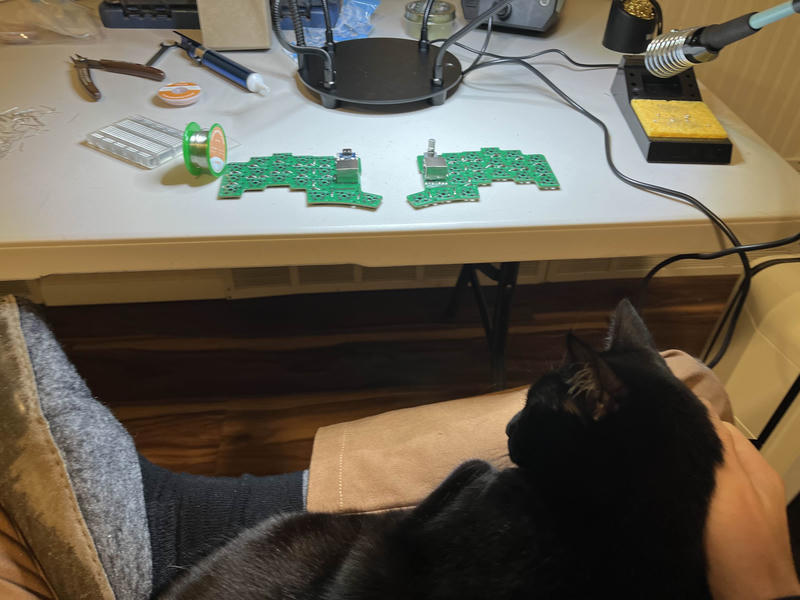
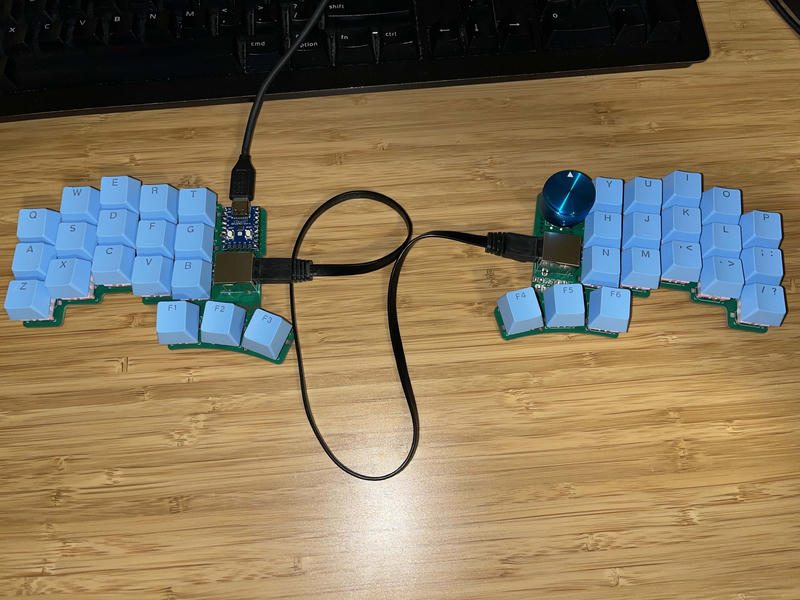
After giving her some well deserved love, I finally was able to seat the switches into the hot swap sockets and finally put the keycaps on. And that was it! The keyboard was physically complete. Now all I had to do was load up the firmware and test it.
Flashing the firmware
I started by flashing the .uf2 file provided on the tompi's git repo. This was as simple as plugging the raspberry pi into my computer while holding the boot button to put it into mass storage mode, and then copying over the .uf2 file as if I were putting a file on a thumbdrive. I saw the board's LED light up and I excitedly started testing it with the default key testing and configuration tool, Vial. I was almost through testing every key, when I had a mild moment of panic: the period key wasn't working! How would I end my sentences? How would I write floating point numbers? I quickly inspected the key and noticed that the hot swap socket wasn't fully soldered on one side (phew!). I soldered that up and the final key was working, my days of using standard punctuation were no longer in danger.
Testing the new keyboard
I started typing on it, and... I actually found it quite awkward. I was coming from a full 104-key standard setup, and jumped straight to this 36-key minimalist "ortholinear" (meaning all the keys are arranged in columns instead of rows) board. This was supposed to be ergonomic, but it just felt unnatural. Plus, the standard firmware was missing a ton of keys that I would need to use for programming at work every day.
Re-flashing the firmware
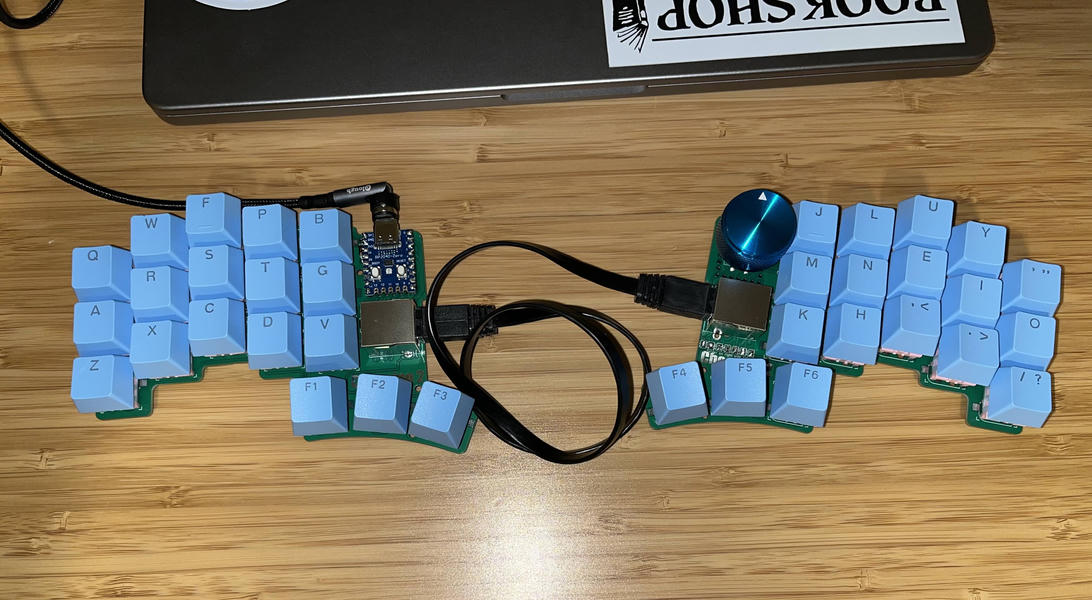
I did some more reading in the firmware section of the Cheapino docs, and the author mentioned that the Miryoku layout was a well thought out layout for minimal split keyboards. The default alphabetic layout for Miryoku was not Qwerty, but a modification of a layout called Colemak. Colemak was developed relatively recently compared to the de facto Qwerty layout, and the less popular Dvorak layout, and it claimed to be better than both of those layouts by placing all the most used keys on the home row or near your index and ring fingers. I figured if I was going to have to relearn to type on this board, then I might as well commit to the pain of relearning how to type all together and go with the more modern, well researched layout.
Installing this layout would require installing QMK, and checking out a specific branch of tompi's fork of the QMK firmware repository (link to the branch here). After getting that flashed, I started relearning to type right away.
The experience so far
It has been about two weeks, and I have been trying to use the board more and more each day. I have been using the website Colemak Club to do typing lessons each day, and I have finally progressed to the final level where all keys are incorporated. It feels pretty neat to be able to type so many words without having to hardly move my fingers from the home row. I am currently at 17 WPM, but I expect that number to slowly keep creeping up each day I use it. I'll try and remember to post another update after I've had some more time to master typing with the new keyboard.
Conclusion
This project was a great reminder on how much I enjoy soldering, and it really opened my eyes to how easy it is to get PCBs fabricated for cheap. I now feel inspired now to go build something where I design my own PCB layout and open source it for the community. We'll see what I come up with...